


I remember when I was starting out as a young molding technician any information I could find either online or in print I would try to take in and learn as much as possible to understand the world of Injection Molding. When I first started many topics were over my head as there is a process to learning best practice and procedures to manufacture quality parts time and again and to make that repeatable every time.
Today we will focus on getting back to the basics of injection molding. This blog will focus on the injection molding cycle, and what it entails.
Assume the injection molding machine has just completed a full cycle and the operating sequence is starting from there:
- 1-The Mold Closes
The mold closes – whether it is a hydraulic system – direct hydraulic, toggle, lock and block, or fully electric press. - 2-The Mold Clamps
The mold is clamped – the preset clamping tonnage is applied to the mold which was determined by the molding projected area. - 3-Sprue Break
In some cases if there is a sprue break employed then the injection unit or carriage moves forward and seats against the sprue. In other cases there is no need for a sprue break and the injection unit retains a constant pressure against the sprue and stays in place throughout each cycle.
- 4-First Stage Injection
The screw pushes forward at a set injection speed and pressure pushing the melted plastic (the shot) that sits in front of the check ring and nozzle. This shot size was previously metered out during the last cycle. - 5-Pack and Hold
When the screw reaches the transfer position you go from first stage injection to second stage injection which is your pack and hold. This is where you change from velocity control to pressure control. When the transfer position is reached most of your cavities will be filled with plastic (more than 95% filled) and the lower pack pressure and hold time will fill the parts the rest of the way out. Note: you never want the screw to bottom out or use all of the plastic that is in from of the nozzle, the amount of plastic left in from of the nozzle at end of fill is known as the cushion and this is vital to ensuring repeatable quality parts. - 6-Cooling
During the cooling time, a number of things are happening at the same time. Cooling allows the heat from the molded parts to dissipate as cooling channels in the mold run cool fluid around the cavities and draw heat away from the molded part to create the finished product. - 7-Screw Rotation
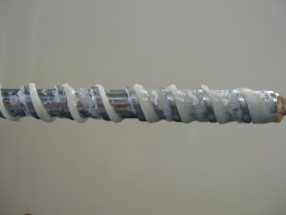
While the cooling process is in effect, the screw rotates and plasticizes the next shot. When the screw turns the check ring slides forward which opens up melt channels for the melted plastic to flow in front of the screw. When the screw pushes forward in the earlier cycle the check ring closes shut to not allow any resin to pass behind the check ring. The screw continues to turn until the shot size is reached and then if there is decompression applied that takes place as well. - 8-The Mold Reopens
Once the cooling time has expired, the mold opens to a set position with the finished parts carried out on the B side of the mold holding onto the cores. - 9-The Part Ejects
Once the mold opens to the desired position, the parts are ejected off the cores and the next cycle can begin. On many machines the butterfly plate moves forward pushing the ejector pins out which eject the parts. The parts could fall onto a conveyor, be picked by a robot, or be picked off the mold manually by an operator. There are also different designs that could come into play with stripper plates and horn pins. There are a wide variety of mold designs which could change this process some but for the majority this holds true.
After these steps are completed the next injection cycle can begin and the whole process starts over each time.
Sealing with Purge isn't the only way to reduce downtime. Learn more about how to reduce production downtime and protect your profits with a purging compound.

Comments